Buying a used car often feels like crossing the finish line, but the real test starts the moment you drive off the lot. The first 90 days are when hidden problems tend to surface, from strange noises to warning lights you never saw during the test drive. Knowing what to watch for during this window can save you thousands of dollars and a lot of stress. This guide walks through the most common issues new used-car owners face and how to handle them before small problems become expensive ones.
Strange Noises Under the Hood
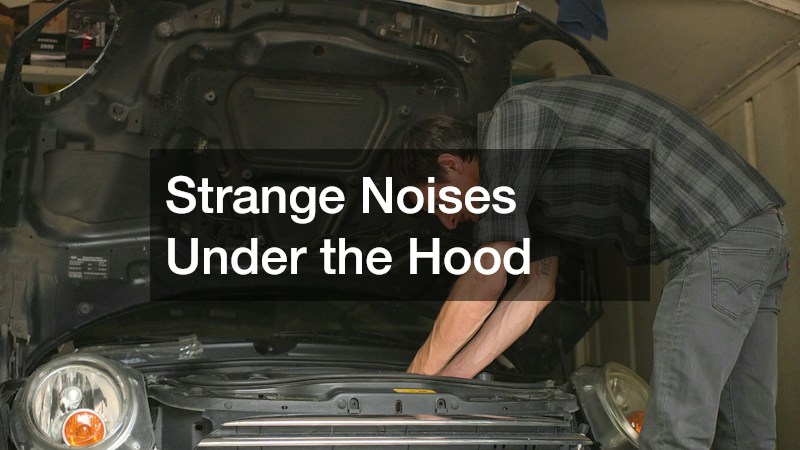
Every used car has its own personality, and some of the noises it makes in the first few weeks are simply new sounds you have not learned to tune out yet. Others are early warnings that something mechanical needs attention before it worsens. A ticking or knocking sound, especially one that changes with engine speed, deserves a mechanic’s inspection rather than a wait-and-see approach. If you purchased a vehicle with a diesel engine, pay close attention to any unusual clatter or vibration at startup, since these engines run louder than gasoline models but should never sound rough once warmed up.
Keep a simple log of when the noise happens, how fast you are driving, and whether it is louder in cold or warm weather. This information helps a technician diagnose the issue faster and cheaper than guessing blind.
- Squealing on startup that fades after a few seconds
- Grinding when turning the steering wheel
- Rattling from underneath that gets louder with speed
- Hissing sounds near the engine bay after shutdown
Braking Performance and Pedal Feel
Brakes are one of the first systems to reveal a used car’s true maintenance history. If the previous owner deferred service, you may notice soft pedal feel, pulsing during stops, or a burning smell after highway driving. Scheduling brake repair early, even if the pads look acceptable, gives you peace of mind and ensures rotors are not warped or unevenly worn. Waiting too long on brake issues can turn a simple pad replacement into a full rotor and caliper job.
Pay attention to how the car behaves during your daily commute for the first month. A vehicle that pulls to one side while braking or requires excessive pressure to stop should be checked immediately, since this can indicate uneven wear or a fluid leak that was not obvious during a pre-purchase inspection.
- Soft or spongy brake pedal
- Squealing or grinding noise when stopping
- Vehicle pulling left or right under braking
- Dashboard warning light for the brake system
Unfamiliar Smells Inside the Cabin

A musty, smoky, or chemical odor that lingers after a week of ownership is worth investigating rather than ignoring. Sometimes it is simply a previous owner’s air freshener residue, but other times it signals mold growth from a water leak or lingering smoke damage that was masked before the sale. Professional car odor removal services use ozone treatment or enzymatic cleaners to break down odor molecules embedded in upholstery and carpet padding, which is far more effective than store-bought sprays that only mask the smell temporarily.
If the odor returns after cleaning, check the trunk, under the floor mats, and around the sunroof drains for moisture. A recurring smell often points to a source that has not been fully addressed and may require removing carpet or seat cushions to treat properly.
- Musty smell that intensifies when the air conditioning runs
- Sweet or chemical odor suggesting a coolant leak
- Smoke smell embedded in fabric seats or headliner
- Damp carpet near the floorboards after rain
Dashboard Warning Lights You Should Never Ignore
It is common for a check engine light to appear within the first few weeks of owning a used car, especially if a sensor was reset before the sale and needs time to recalibrate. However, some warning lights demand immediate attention rather than a wait-and-watch approach. A flashing check engine light, for example, often means the engine is misfiring and could cause damage if you keep driving.
One frequent culprit behind a stubborn check engine light is a failing catalytic converter, which controls emissions and can trigger reduced power or a rotten egg smell from the exhaust. Replacing this part is not cheap, so if your pre-purchase inspection did not include an emissions check, get one done as soon as the light appears. Catching the problem early can also prevent it from damaging other exhaust components.
- Solid check engine light versus flashing check engine light
- Oil pressure warning that appears at idle
- Battery or charging system alert
- ABS or traction control light staying on
Signs of Prior Accident Damage

Even with a clean vehicle history report, some used cars carry damage that was never formally reported. Panels that do not line up evenly, mismatched paint under certain lighting, or overspray inside the wheel wells can all be signs of a previous car accident that was repaired informally. These clues are easier to spot once you have lived with the car for a few weeks and start noticing details you missed during the initial walk-around.
If you suspect hidden damage, a body shop can perform a deeper inspection using paint thickness gauges and frame measurement tools. This is especially important if you notice uneven tire wear or the steering wheel sits off-center while driving straight, both of which can indicate frame damage from an auto collision that was never disclosed.
- Doors or trunk that do not close flush
- Paint color slightly different between panels
- New parts installed next to heavily worn originals
- Steering wheel off-center during straight-line driving
Evaluating Repairs from a Previous Owner
Many used cars come with a repair history that includes work from insurance claims, and it pays to understand what was actually done before you sign anything. Ask the seller or dealership for any paperwork related to past collision repair, including estimates, invoices, and photos taken during the process. This documentation can reveal whether the work was completed by a certified shop or a budget operation cutting corners to save time and money. Pay close attention to who performed the repair and what standards they followed. Shops certified by the vehicle’s manufacturer typically use OEM parts and follow factory repair procedures, while independent shops may use aftermarket parts or shortcuts that don’t meet the same specifications. A repair invoice that lists vague terms like “frame straightened” without specific measurements or calibration details is a red flag worth investigating further. Quality collision repair should restore the vehicle’s structural integrity, not just its appearance. This means checking that safety systems like airbags, sensors, and seatbelt pretensioners were properly reset or replaced, not simply reinstalled. It’s also worth asking whether the shop performed a post-repair alignment and scan of the vehicle’s computer systems, since modern cars rely heavily on sensors that can be thrown off by even minor collisions. If you have any doubts, a pre-purchase inspection from an independent mechanic can confirm whether the repair work holds up structurally and mechanically. Spending $100 to $200 on this inspection is far cheaper than discovering hidden frame damage or faulty welds after you’ve already bought the car.
If you find evidence of past bodywork after the sale, consider having a trusted shop review the welds, frame alignment, and airbag system. Uneven panel gaps, overspray on rubber trim, or paint that doesn’t quite match between panels are all signs worth investigating further. Poor collision repair can leave a car vulnerable in a future accident, even if it looks flawless from the outside, so this step is worth the time and modest cost involved. A qualified technician can pull a scan report to check whether airbag control modules were properly reset or replaced after deployment, since a faulty reset can mean your airbags fail to deploy correctly if you’re ever in another crash. They can also measure the frame with specialized equipment to confirm it’s within factory tolerances, since even a quarter-inch of misalignment can affect handling and tire wear over time. This kind of inspection typically costs somewhere between $100 and $250, which is a small price compared to the cost of driving an unsafe vehicle. A shop specializing in auto collision repair can also tell you whether factory-spec parts were used or whether cheaper aftermarket substitutes were installed during the original fix. Aftermarket bumpers, fenders, and structural components don’t always meet the same crash-test standards as OEM parts, particularly on vehicles with advanced driver-assistance sensors built into the bodywork. Ask the shop for a written estimate of what proper auto collision work would have cost, since a suspiciously low prior repair bill often signals shortcuts were taken.
- Request copies of any repair invoices or insurance estimates, and match dates/mileage to the vehicle history report
- Check that airbags were properly replaced if deployed previously, not just the dash light reset
- Verify frame alignment with a measurement tool; tolerances beyond 1/8 inch on either side signal unresolved structural damage
- Ask whether OEM or aftermarket parts were used during the repair, especially for safety systems like brakes and airbags
- Look for mismatched paint, uneven panel gaps, or overspray in wheel wells as signs of undisclosed bodywork
- Confirm any recall-related repairs were completed by checking the VIN on the manufacturer’s website
- Have a trusted mechanic inspect welds and undercarriage for signs of rust hiding collision repairs
Fluid Leaks and Maintenance Surprises
The first three months of ownership often reveal maintenance issues that a pre-purchase inspection missed, particularly with fluids. Spots under the car, a burning smell, or fluid on the driveway are all worth investigating immediately rather than assuming they are normal for an older vehicle. Even a small drip can signal a seal that’s about to fail completely, so it’s better to catch it early than wait for a breakdown on the highway. Learning to identify fluids by sight and smell makes a real difference when explaining a problem to a mechanic. Engine oil is typically amber to dark brown and feels slick between your fingers. Coolant is usually green, orange, or pink and has a sweet smell, while transmission fluid is red or reddish-brown when healthy but turns brown or smells burnt when it’s degraded. Brake fluid, often overlooked, is light yellow and turns darker as it absorbs moisture over time. Location matters too. A puddle near the front-center of the car often points to coolant, while a spot toward the middle or rear suggests transmission or differential fluid. Oil tends to show up near the engine, roughly under the hood’s midpoint. Beyond leaks, watch for maintenance items the previous owner may have neglected, like an overdue timing belt, a clogged cabin air filter, or transmission fluid that was never changed at recommended intervals. A quick check of maintenance records, if available, combined with a fresh fluid inspection in the first few weeks, can help you catch small problems before they turn into repair bills running into the hundreds or thousands of dollars.
- Reddish fluid suggesting a transmission leak — often from a worn pan gasket or seal, and low fluid can cause slipping or rough shifting if ignored
- Bright green, orange, or pink fluid pointing to coolant — check the reservoir and radiator hoses, since low coolant risks overheating within days
- Dark, oily spots indicating an engine oil leak — inspect the oil pan gasket, valve cover, or drain plug, and check the dipstick weekly until the source is found
- Yellowish or amber fluid near the wheels signaling brake fluid loss — treat this as urgent, since it directly affects stopping power
- Clear fluid that is usually just air conditioning condensation — normal in humid weather and nothing to worry about
- Sweet-smelling fluid, even if faint, that can indicate a coolant leak long before a puddle appears
The first 90 days with a used car are about paying attention, not panicking over every new sound or smell. Keep a simple record of anything unusual, address small issues quickly, and do not hesitate to get a second opinion from a trusted mechanic when something feels off. Being proactive during this window protects your investment and helps you enjoy your car with confidence for years to come.